|
|
|
Porsche, and the Porsche crest are registered trademarks of Dr. Ing. h.c. F. Porsche AG.
This site is not affiliated with Porsche in any way. Its only purpose is to provide an online forum for car enthusiasts. All other trademarks are property of their respective owners. |
|
|

  |

| JRust |
 Sep 17 2009, 11:40 PM Sep 17 2009, 11:40 PM
Post
#41
|
|
914 Guru  Group: Members Posts: 6,307 Joined: 10-January 03 From: Corvallis Oregon Member No.: 129 Region Association: Pacific Northwest |
I'll put a wire brush attatchment on my grinder tommorwo to see how large the piece is. Just hoping someone would chime in with the info
|
   |

 
|
| FourBlades |
Sep 18 2009, 06:32 AM
Post
#42
|
|
From Wreck to Rockin Group: Members Posts: 2,054 Joined: 3-December 07 From: Brevard, FL Member No.: 8,414 Region Association: South East States |
The inner and outer suspension points are connected after they are put on using a plate of 14 guage overlapping and bent over both. Around the middle pages of my 73 restoration I have pictures of how I put my console on and put on the overlapping reinforcement. I just made one out of scrap metal and welded and bent it progressively over the parts. http://www.914world.com/bbs2/index.php?sho...tion&st=100 John |
|
|
|
| Joe Bob |
Sep 18 2009, 07:55 AM
Post
#43
|
|
Retired admin, banned a few times Group: Members Posts: 17,427 Joined: 24-December 02 From: Boulder CO Member No.: 5 Region Association: None |
"Project 6" did a recent complete suspension console replacement. He did some pics and has some input.
|
|
|
|
| JRust |
Sep 18 2009, 11:14 AM
Post
#44
|
|
914 Guru Group: Members Posts: 6,307 Joined: 10-January 03 From: Corvallis Oregon Member No.: 129 Region Association: Pacific Northwest |
QUOTE(FourBlades @ Sep 18 2009, 05:32 AM)  The inner and outer suspension points are connected after they are put on using a plate of 14 guage overlapping and bent over both. Around the middle pages of my 73 restoration I have pictures of how I put my console on and put on the overlapping reinforcement. I just made one out of scrap metal and welded and bent it progressively over the parts. http://www.914world.com/bbs2/index.php?sho...tion&st=100 John That is perfect thanks for the link & explanation. I figured it was just a plate but didn't want to take the chance of screwing up another part. It would have been obvious had I got all the undercoating off before asking. Was just limited in my time in the garage last night. I'll get it all cleaned up tonight. Welding in the new ear tommorow with some help from EyeTrip from the world. I also have CFR's reinforcement piece to weld on both ears. I didn't get the brace but do plan to do that eventually too. I'll post some more pics as I go. Going to document each piece & make a consise tech article on it. That way it will be a brief & not involve someone going thru a whole thread. Just to find the info they want on replacement. How well it turns out remains to be seen (IMG:style_emoticons/default/dry.gif) |
|
|
|
| JazonJJordan |
Sep 18 2009, 02:31 PM
Post
#45
|
|
Member Group: Members Posts: 340 Joined: 6-June 09 From: Atlanta-Augusta, Georgia area Member No.: 10,446 Region Association: South East States |
QUOTE(dr914@autoatlanta.com @ Jul 16 2009, 12:43 PM) QUOTE(JRust @ Jul 15 2009, 09:33 PM) So I notice my passenger rear wheel camber was way off. That side of the car was sagging a little bit. I figured something came loose. I jack up that side of my car (IMG:style_emoticons/default/headbang.gif) (IMG:style_emoticons/default/headbang.gif) (IMG:style_emoticons/default/headbang.gif) (IMG:style_emoticons/default/headbang.gif) (IMG:style_emoticons/default/headbang.gif) (IMG:style_emoticons/default/headbang.gif) (IMG:style_emoticons/default/headbang.gif) (IMG:style_emoticons/default/headbang.gif) (IMG:style_emoticons/default/headbang.gif) (IMG:style_emoticons/default/headbang.gif) Take a look at my suspension ear (IMG:style_emoticons/default/hissyfit.gif) (IMG:style_emoticons/default/hissyfit.gif) (IMG:style_emoticons/default/hissyfit.gif) Tremendously worthwhile project. We make that part of course and have many in stock (IMG:style_emoticons/default/flag.gif) |
|
|
|
| JRust |
Mar 23 2011, 09:57 PM
Post
#46
|
|
914 Guru Group: Members Posts: 6,307 Joined: 10-January 03 From: Corvallis Oregon Member No.: 129 Region Association: Pacific Northwest |
Okay so fast forward a year & a half. I am now getting to my suspension ear again. Spent some time grinding off the reinforcement plate under the suspension ear off. What a PITA! I stopped after getting a little overagressive & going through my frame. (IMG:style_emoticons/default/headbang.gif) . Not alot but I couldn't see for (IMG:style_emoticons/default/stromberg.gif) with all the sparks & I was frustrated it was going so slow. So I bailed last night pissed off for being an idiot (not a first (IMG:style_emoticons/default/sad.gif) ). I will be working on it more this weekend. A friend was going to come down tommorow night to weld the new one in. I had to put it off until next week to be sure I would be ready.
Some of the suspension ear welds I can't get to with the grinder either? Guess maybe a dremel with the right tip. I will drill out the rest of the pinch welds up top this weekend. Then I'll tackle the underside with the top done. Should be a little easier doing the bottom with the top off & out of the way. Grinding effectively is an art I need to get much better at though (IMG:style_emoticons/default/blowup.gif) (I thought my head might last night) |
|
|
|
| Eric_Shea |
Mar 23 2011, 10:54 PM
Post
#47
|
|
PMB Performance Group: Admin Posts: 19,275 Joined: 3-September 03 From: Salt Lake City, UT Member No.: 1,110 Region Association: Rocky Mountains |
You should have driven 9 hours to McMarks back in 2009. I woulda been done a couple years ago! (IMG:style_emoticons/default/w00t.gif)
|
|
|
|
| sean_v8_914 |
Mar 24 2011, 07:52 AM
Post
#48
|
|
Chingon 601 Group: Members Posts: 4,011 Joined: 1-February 05 From: San Diego Member No.: 3,541 |
sarch my screen name. I have posted a few replacements (I hope it was not on 914club)
these things rust inside, get weak then break. brace it up only if you track it with fat sticky tires. HP has nothing to do with it. grip is what determines this. add spot welds to the inside seams |
|
|
|
| sean_v8_914 |
Mar 24 2011, 07:53 AM
Post
#49
|
|
Chingon 601 Group: Members Posts: 4,011 Joined: 1-February 05 From: San Diego Member No.: 3,541 |
I attach the replacement with screws, then do a mock-assembly to check toe adjustment
|
|
|
|
| JRust |
Mar 24 2011, 10:01 AM
Post
#50
|
|
914 Guru Group: Members Posts: 6,307 Joined: 10-January 03 From: Corvallis Oregon Member No.: 129 Region Association: Pacific Northwest |
QUOTE(sean_v8_914 @ Mar 24 2011, 06:53 AM) I attach the replacement with screws, then do a mock-assembly to check toe adjustment I was planning on doing that to make sure everything is in the right spot. I sure as hell don't want to do this twice (IMG:style_emoticons/default/dry.gif) . It's about time I get to it. I've let to many projects leap frog this one. Pretty pitiful as none of them are working yet. I could have fixed this a year ago & been driving this 914 again (IMG:style_emoticons/default/headbang.gif) . I guess better late than never. (IMG:style_emoticons/default/blink.gif) |
|
|
|
| JRust |
Apr 1 2011, 11:20 PM
Post
#51
|
|
914 Guru Group: Members Posts: 6,307 Joined: 10-January 03 From: Corvallis Oregon Member No.: 129 Region Association: Pacific Northwest |
Made some progress tonight. I got the upper half of the suspension ear off. I'll be finishing up the bottom half tommorow. Damn it took a while to do the top. I've got quite a bit of the bottom allready. Getting a little better feel for my grinder now. My battery tray had some rust on it & I cut it off. There is some on the wall there also. The hell hole is solid but I have some surface in that hole area I need to clean up. I still need to get off the small section of battery tray attatched to the side. I'll get that off tomorrow too. Then clean up, prime & paint the area. Well not paint yet. I need to get my new ear welded on first.
Overall I had a much better night working on it that the last time (IMG:style_emoticons/default/smile.gif) . Attached thumbnail(s) 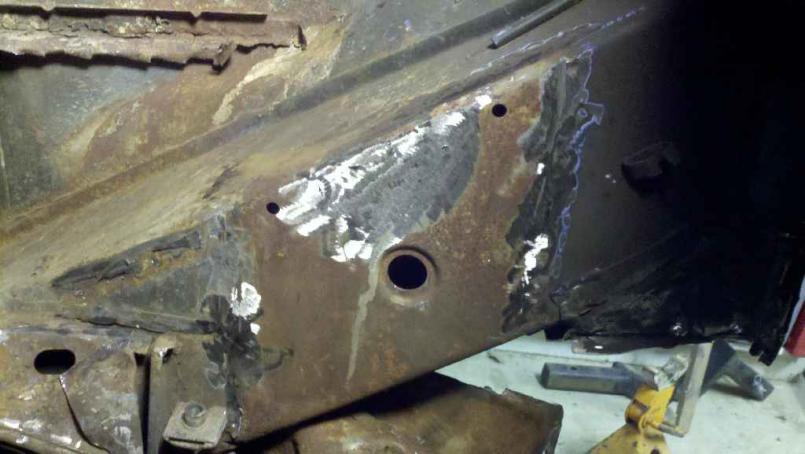 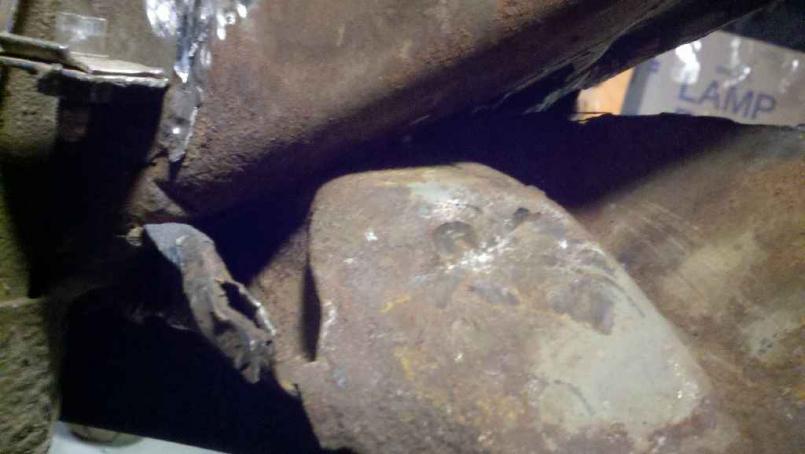
|
|
|
|
| computers4kids |
Apr 2 2011, 08:53 AM
Post
#52
|
|
Love these little cars! Group: Members Posts: 2,443 Joined: 11-June 05 From: Port Townsend, WA Member No.: 4,253 Region Association: None |
QUOTE(JRust @ Apr 1 2011, 10:20 PM) Made some progress tonight. Jamie, This is good news. I just don't know how you can go between 3 projects, financially or energy. Although, I do have project envy thinking about all of them. I'm especially fascinated with the suby conversion...I guess because its so different. Hopefully my job will give me some freedom this Summer. If I get to go to the WCR, it would be nice to come early by your place and give you a hand if you want on whatever project you need help with. I would like to see you get your LE on the road, or your V8. Not having a teener to drive would totally suck. In a perfect world, at least for me, I would like to have a fun teener to drive daily and a project in the garage that I can take my time with. (IMG:style_emoticons/default/popcorn[1].gif) |
|
|
|
| J P Stein |
Apr 2 2011, 01:18 PM
Post
#53
|
|
Irrelevant old fart Group: Members Posts: 8,797 Joined: 30-December 02 From: Vancouver, WA Member No.: 45 Region Association: None |
It's kinda late now but.....it's better to fix it before it breaks.....easier too. (IMG:style_emoticons/default/biggrin.gif)
If one side goes, the other is probably close behind, me thinks. There are a few things can do that (I believe) help "things" along without turning it into a major project. Seam welding everything in the area ....both sides, including the pinch seam around the perimeter of the ear itself. I did that long ago and it never broke.....but it didn't have my total trust. So, I made a major project of it.(IMG:style_emoticons/default/biggrin.gif) The "since I'm here" scenario can be a good thing. Attached thumbnail(s) 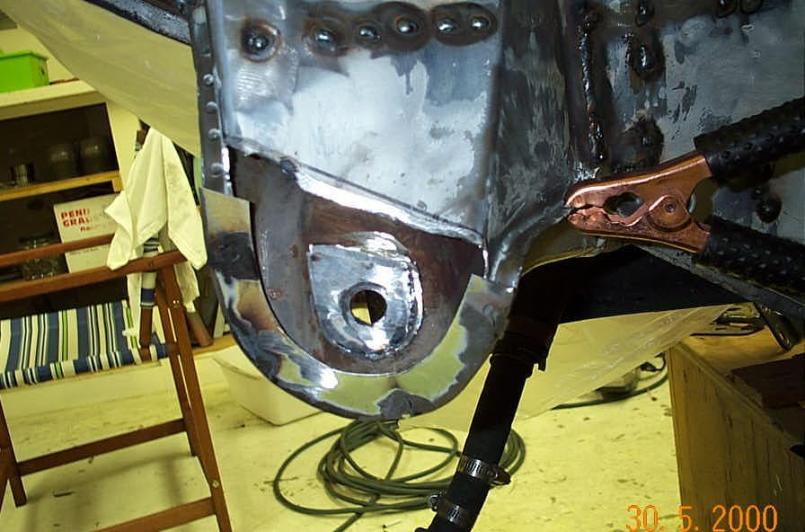 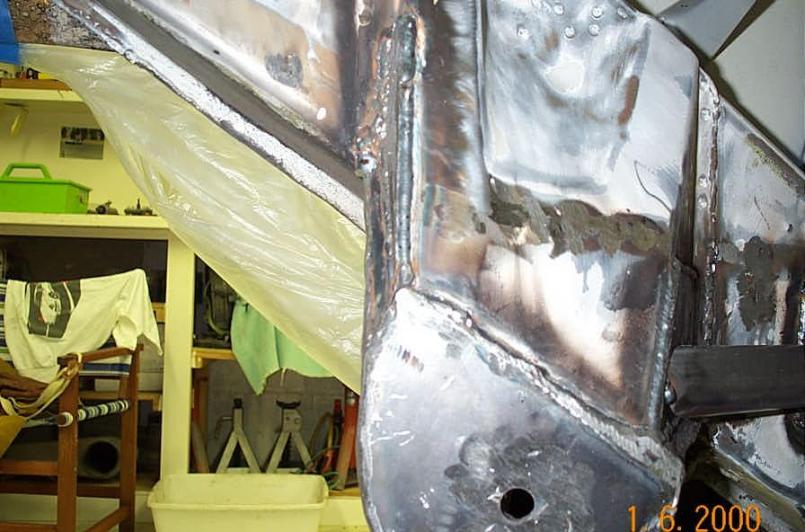 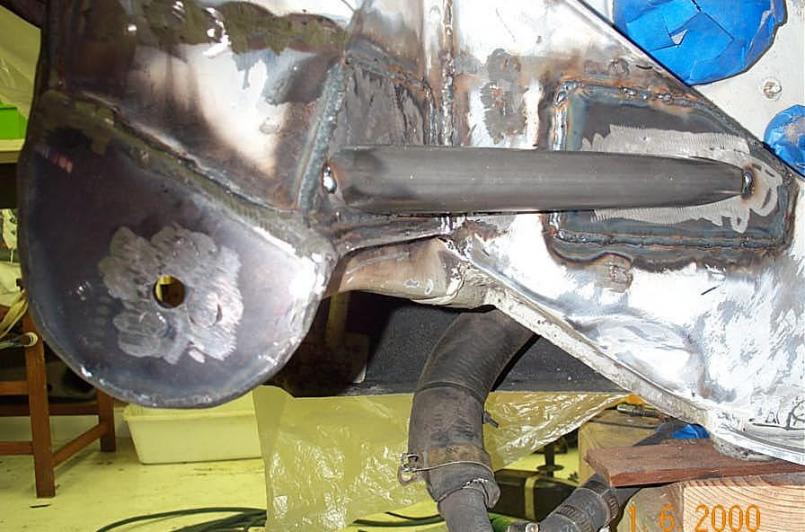
|
|
|
|
| JRust |
Apr 16 2011, 10:55 PM
Post
#54
|
|
914 Guru Group: Members Posts: 6,307 Joined: 10-January 03 From: Corvallis Oregon Member No.: 129 Region Association: Pacific Northwest |
Made great progress today! Ian came down to weld my new ear in place. I needed to clean the metal up more in prep. Then did alot of measuring to make sure we got it set in place. Always nice having another 914 there handy to measure off of. Anyway the new ear is in & nice & solid. I can't wait to get my v8 off the stand & get a tranny bolted up. Although with the clinic coming in a few week probably not much point to that. I do need to finish cleaning the battery tray area. It was rusted but the hell hole is in good shape. Still there is some on the wall I need to clean up. So I'll spend some time in there with a wire wheel. Then repaint it before the motor get's back in place.
Huge thanks to Ian for coming down & (IMG:style_emoticons/default/welder.gif) for me. Don't worry I will be hooking you up with plenty of parts during your build (IMG:style_emoticons/default/biggrin.gif) Attached thumbnail(s) 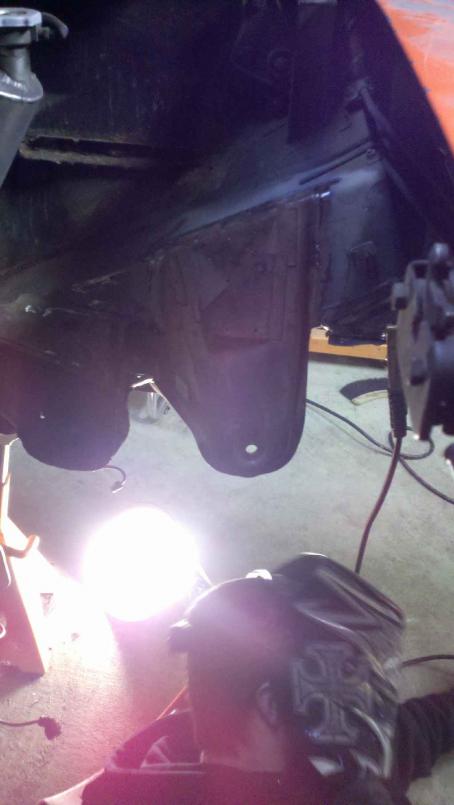 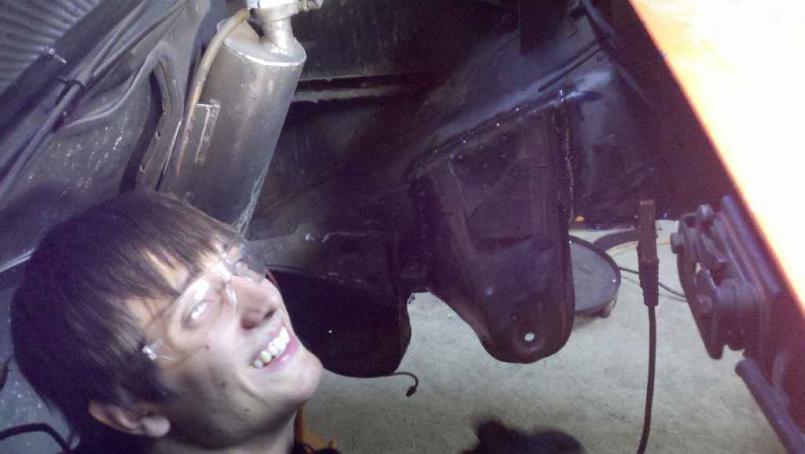
|
|
|
|
| IM101 |
Apr 16 2011, 11:58 PM
Post
#55
|
|
Member Group: Members Posts: 264 Joined: 9-November 10 From: Boise Idaho Member No.: 12,367 Region Association: Pacific Northwest |
Wow that is a nice angle on the photo, that picture was taken right as i was about to attack and bite Jamie thus enabling me to control him with my vampire powers and make him give me parts from his stash, (IMG:style_emoticons/default/happy11.gif) evidence:
QUOTE I will be hooking you up with plenty of parts during your build (IMG:style_emoticons/default/biggrin.gif) but in all seriousness no problem man it was great fun hanging and working on a 914 (IMG:style_emoticons/default/biggrin.gif) and I'm looking forward to helping you get your flock ready for the wcr!! |
|
|
|
| PeeGreen 914 |
Apr 17 2011, 12:10 AM
Post
#56
|
|
Just when you think you're done...wait, there is more..lol Group: Members Posts: 10,219 Joined: 21-September 06 From: Seattle, WA... actually Everett Member No.: 6,884 Region Association: Pacific Northwest |
|
|
|
|
| JRust |
Apr 17 2011, 09:11 AM
Post
#57
|
|
914 Guru Group: Members Posts: 6,307 Joined: 10-January 03 From: Corvallis Oregon Member No.: 129 Region Association: Pacific Northwest |
QUOTE(IM101 @ Apr 16 2011, 10:58 PM) Wow that is a nice angle on the photo, that picture was taken right as i was about to attack and bite Jamie thus enabling me to control him with my vampire powers and make him give me parts from his stash, (IMG:style_emoticons/default/happy11.gif) evidence: QUOTE I will be hooking you up with plenty of parts during your build (IMG:style_emoticons/default/biggrin.gif) but in all seriousness no problem man it was great fun hanging and working on a 914 (IMG:style_emoticons/default/biggrin.gif) and I'm looking forward to helping you get your flock ready for the wcr!! (IMG:style_emoticons/default/lol-2.gif) You funny man (IMG:style_emoticons/default/blink.gif) . I have to admit I woke up more excited than I was last night. Just thinking baout getting that puppy back on the road. I may just start getting all the pieces out today. Well I need to clean up the battery tray area first. So I'll tear into that this afternoon. Yeah progress (IMG:style_emoticons/default/smilie_pokal.gif) . Not to mention I have my glass flares to install on this car. I think for my first try I am just going to use rivets. If I like it & plan to keep the glass flares. I'll get the dzus fasteners for it. |
|
|
|
| montoya 73 2.0 |
Apr 17 2011, 04:02 PM
Post
#58
|
|
Lack of consideration to others, and Selfish! Group: Members Posts: 1,791 Joined: 27-October 04 From: Paso Robles, Ca. Member No.: 3,016 Region Association: Central California |
|
|
|
|
| JRust |
Apr 18 2011, 10:42 PM
Post
#59
|
|
914 Guru Group: Members Posts: 6,307 Joined: 10-January 03 From: Corvallis Oregon Member No.: 129 Region Association: Pacific Northwest |
I went out tonight & got the rest of the old battery tray out. Cleaned up the whole area of surface rust. Primed it all & emailed restoration design. I need a new battery tray & support. I'm hoping they can get it out quick so I can get it this weekend.
|
|
|
|
| IM101 |
Apr 18 2011, 11:37 PM
Post
#60
|
|
Member Group: Members Posts: 264 Joined: 9-November 10 From: Boise Idaho Member No.: 12,367 Region Association: Pacific Northwest |
QUOTE(JRust @ Apr 18 2011, 09:42 PM) I went out tonight & got the rest of the old battery tray out. Cleaned up the whole area of surface rust. Primed it all & emailed restoration design. I need a new battery tray & support. I'm hoping they can get it out quick so I can get it this weekend. sounds like i will have a couple welding jobs to do when im down next, while I'm at it hit me with a measurement from the firewall to the ear and i can bring some tubing and plates to do some cfr style supports. (IMG:style_emoticons/default/welder.gif) |
|
|
|
|
1 User(s) are reading this topic (1 Guests and 0 Anonymous Users)
0 Members:

|
Lo-Fi Version | Time is now: 19th May 2024 - 10:26 PM |
Invision Power Board
v9.1.4 © 2024 IPS, Inc.